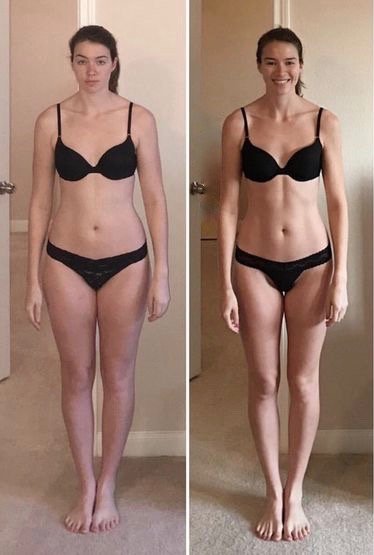
So you’ve been eating well, working out regularly and staying consistent. Then you step on the scale and are met with disappointment when the number glaring back at you pops up. Don’t panic! The number on the scale doesn’t lie, but it also doesn’t tell the entire truth. What’s missing is that it doesn’t tell you if you’ve lost fat, gained muscle or are retaining water.
Even though you see your reflection in the mirror every day, it’s difficult to actually notice if you’re making progress. A better way to monitor your improvement is to take progress photos. When you compare photos of yourself from when you first started your new fitness regime we promise you’ll be pleasantly surprised.
BE CONSISTENT with your photos. Decide ahead of time how you will be taking your photos. Will you be using the photo timer on your camera or iPad? Practice taking the images so you get the picture to be taken at eye level and capture your entire body in the photo. Mark the spot with a piece of tape so you will be consistent with the distance and prop the phone or iPad appropriately so you don’t have a ton of extra ceiling space, etc. in your pic. Don’t have your camera positioned up or down, but straight ahead at eye level.
Our 8 tips for the best before & after fitness progress photos
To guarantee the best progression photos, here are our top tips. Follow these and you’ll produce pictures that help you stay on track, monitor your progress effectively and reach your fitness goals.

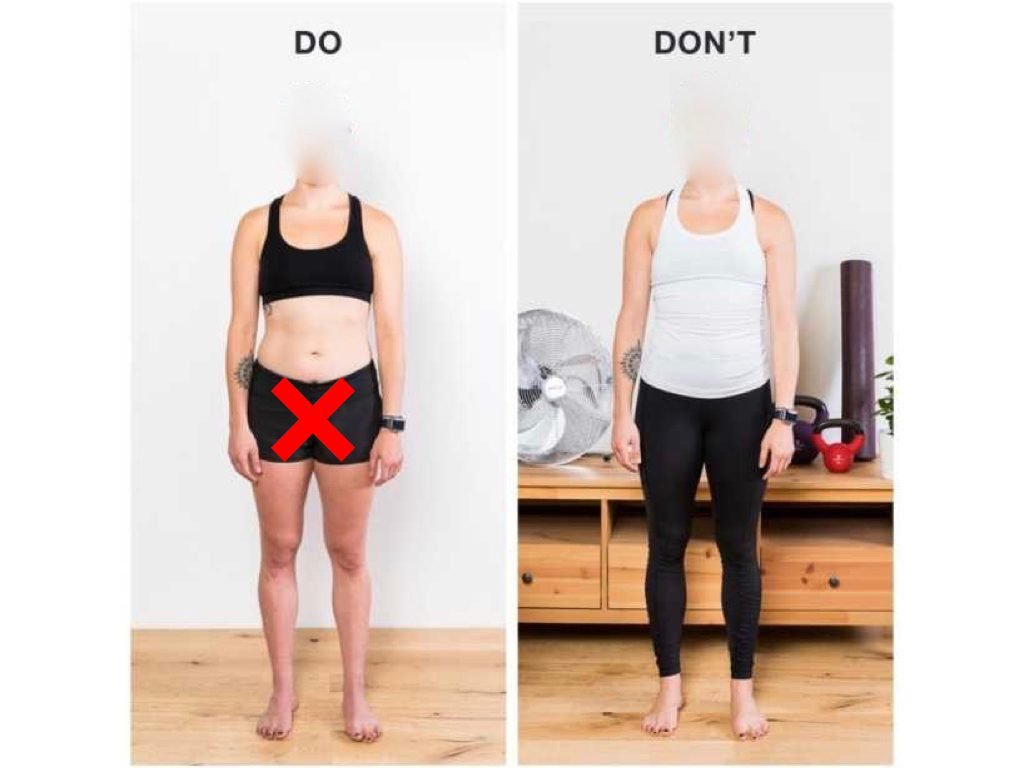
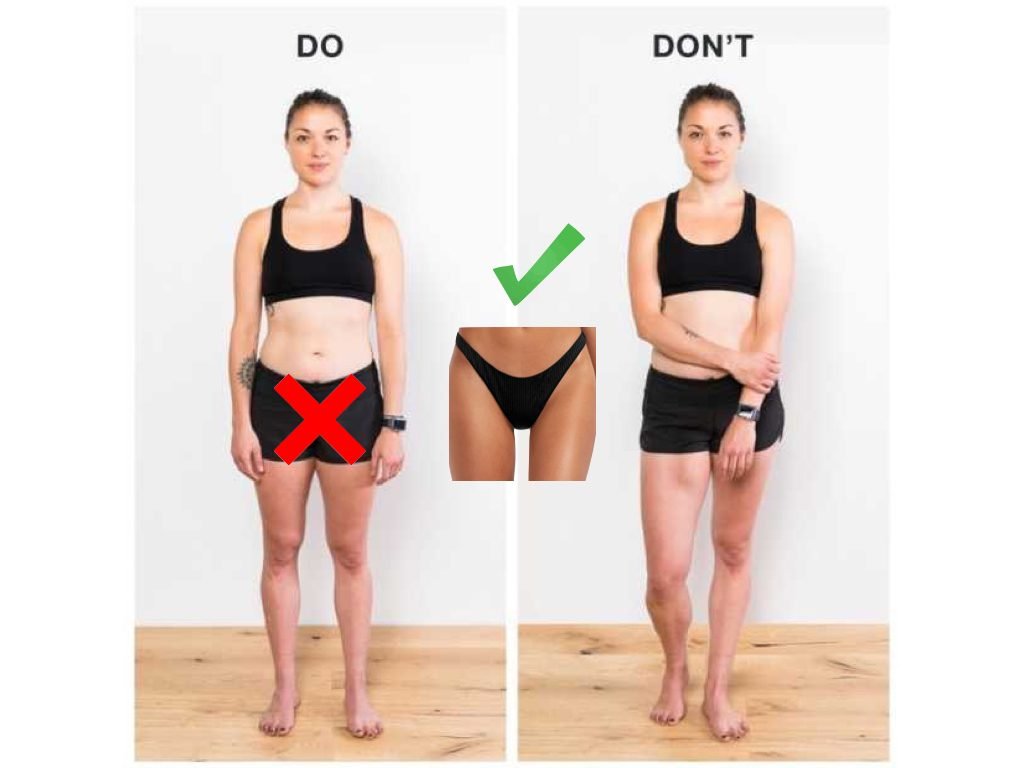
Tip 1: Show your shape
To compare the changes, you’ll need to see the changes. It’s impossible to do this if you’re wearing a baggy t-shirt or shorts. Form-fitting activewear/swimwear is best. Your stomach area should be visible, as this is a great indicator of weight loss and/or muscle gain.

Tip 2: Wear the same clothes
If you can’t wear the same outfit, at least wear something similar every time you take your picture. If you’re proud of your progress, you might want to show others, so we encourage you to wear attire that is post worthy.
Tip 3: Use a plain wall
Make sure there is no clutter, patterns, bright colors or distracting objects in the background. Also, use the same spot for each time you take your progress shots.
Tip 4: Take a full-body photo at eye level
No mirror selfies. If you find this challenging, ask someone you feel comfortable with to take your photo or use a timer function. Make sure to position your body straight and center to fill the frame.
Tip 5: Shoot from 3 angles
To understand the full scope of how your body is changing, it’s important to capture your front, side, and back. For consistency, always choose the same side each time.

Tip 6: Stand in natural light
Try to take your photo in natural daylight. If that isn’t possible, ensure that your room is well lit and there is as much light as possible.

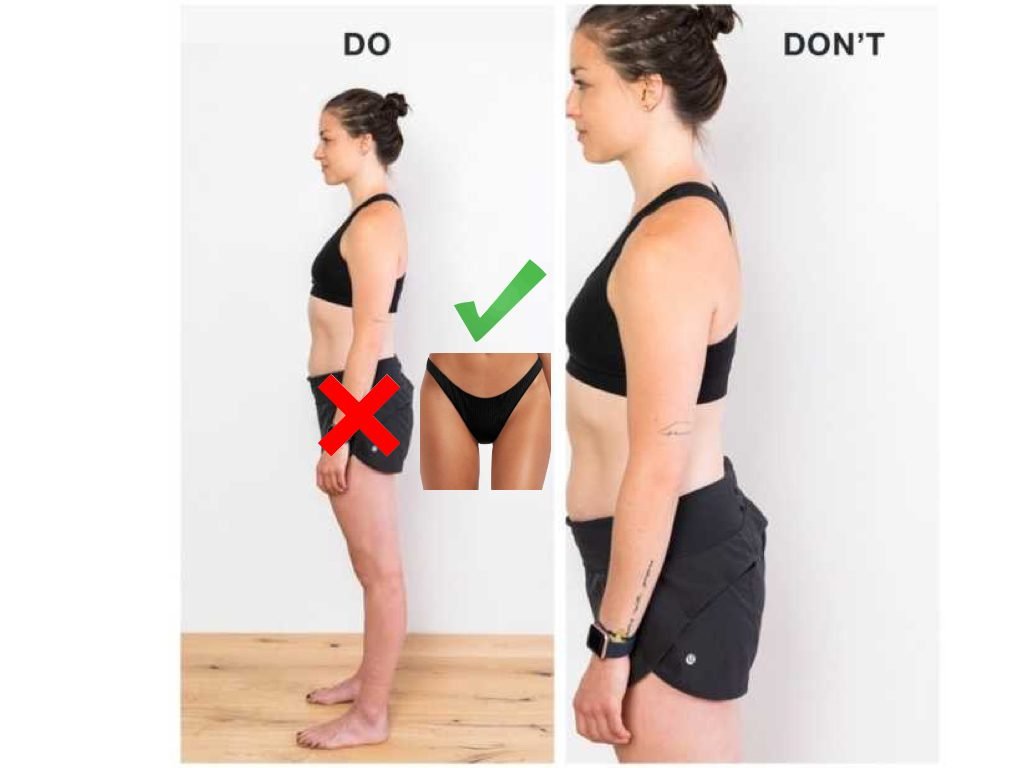
Tip 7: Maintain good posture
Stand up straight, with your shoulders back and down and arms relaxed at your sides. Recreate the same pose each time.
Tip 8: Take photos WEEKLY!
It’s important to take your photos once every week and schedule it on the same day.
Bottom line
Take your time getting your photos right — you’ll appreciate it down the line. This is your journey and you should take pride each step of the way. Clear, well-captured progress photos will really help you see just how far you’ve come and will propel you even further to reach your fitness goals.